Showing posts with label Crafts. Show all posts

Sunday, October 20, 2013

Adventures in Painting....


I do not like to paint.
Now repeat another 100 times and you may be a bit closer to understanding the depths that I will go to NOT paint anything, especially furniture.
I have had bad experiences with painting in the past. Don't get me wrong, I love a good paint job but, those paint swatches that you choose from are not so accurate once they are painted on the wall, and in the right lighting can be very scary!!! I’m still having nightmares from a purple bedroom I had growing up :(

Now with that being said, I have also painted furniture before. I had an old wood farmhouse table that (three kids later) was in dire need of a good re-staining or paint job. I decided that I would just paint it because re-staining it would be much harder, or so I thought.
Oh Em Gee!!! Was I wrong! I had only started sanding it to find that what seemed like such a great idea, was more work than I had anticipated (remember I had three little ones and NO time for this). So it was then that I stopped the sanding and just started painting (mistake# 1). When it was finished, I loved it!!! It's rich black color gave the entire room a whole new look. And I was so proud that we did this ourselves.


Forward less than two years ahead….that poor un-sanded, unsealed paint job was still beautiful over-all but started to look like a hot mess. It had been used for many dinners, crafts, and kids coloring & painting and was showing its use. For a long time I just threw a table cloth over it and tried to ignore the horrible scratched up, worn paint that was hiding underneath (obviously, from a bad paint job). 

After much controversy, we decided to get rid of it and replace it with a beautiful glass top large round elegantly carved table with leather seats (mistake #2). It was beautiful and had the most comfortable chairs I've ever sat in. I loved it…..as long as I spent every waking minute wiping off the glass! Table cloths became my purchase of choice once again.....ughhhh!

A new home and money saved to redecorate, I realized it was time to let go of the glass top once and for all and do this breakfast room right.
It was then that I remembered how much I loved my solid sturdy farmhouse table that suffered the bad, rushed paint job.

Well folks, I did decide to attempt this painting furniture thing again. I sold my glass top table (thank goodness) on craigslist and bought an old strong and sturdy farmhouse table and chairs that need some TLC in the painting area. I’m not sure if I am keeping the chairs but if I find ones I like, they will most likely have to be painted, too.
Wish me luck…I will keep you posted :)
Please follow my adventures in painting as I am sure it will be, if anything, a funny story.


Thursday, February 2, 2012

I Dig You

I think that my kids are taking after my crafty side (thank goodness)!

For this Valentines Day, the kids asked me if they could make their own Valentines Day Gifts. I happily agreed hat it was a great idea. At the kids ages now (12, 10, & 8) it is pretty hard to come up with Valentine cards that are age appropriate so I turned to my good friend, Pinterest, for suggestions......this is what we all fell in love with:
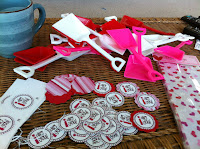
I quickly searched for everything I needed to make these cute Valentines.
All the information can be found here.
I enjoyed making these with my kids but, I seemed to do most of the work.....I didn't mind at all, though.

Wednesday, October 12, 2011

I'm Pinned

I consider myself to be crafty. I am a whiz at sewing, I can paint, scrapbook, photograph, I make cards and paper crafts, I cook, bake, decorate and design......yep, I'm one crafty mom.

But, there are times when I just lose that creative juice inside of me and I sit in my craft room and am truly stumped! I don't like those moments at all. This is not supposed to happen to a crafty person, right? Well, it does! and with my busy schedule lately, I have these crazy un-crafty moments, more and more.

Well, I have a feeling things may be a little different from now on.....thanks to Pinterest.

Pinterest is my inspiration, when mine is lost. When I want to relax or enjoy some me time, I turn on my computer or pick up my phone and navigate my way to Pinterest. I browse boards to see what random people from across the world are pinning. I go through my own boards to feel inspired and see what things have caught my eye in past months.

I have boards for every aspect of my life- recipes, decorating, holiday and gift ideas, art projects to try with my littles, and even an entire board dedicated to outfits. One day I hope to have my home entirely remodeled like the pins I have on Pinterest.

I think that Pinterest will help me not lose my creative brain the next time I am pregnant. Hopefully, the boards that I have worked so hard to create will inspire me and keep my crafty mom side working despite what my busy life brings.

Monday, December 7, 2009

Just For You

Call me crazy but, even when the year has me flying by the seat of my pants, I find it hard not to take the time to make my traditional Christmas cards. You knowthe ones I am talking about.... the handmade ones that I start making in October, that take forever to make, need extra postage because of all the embellishments, and look just as nice as bought ones.....yeah, those!
Well with the help of my good friend Nikki, I've been working on them little by little everyday and I can gladly say that they will be mailed on Monday. What a relief!

Enjoy, my friends...these cards were made just for you!

Wednesday, November 25, 2009

Cookie Time

Whether it's a holiday, special occasion, or just a long, boring afternoon and a way to pass the time is needed, baking cookies is a great activity anytime. It is also one of the easiest ways I spend quality time with my children. Baking cookies gives them the chance to get their hands dirty while making something fun, and tasty together and cherish some irreplaceable moments in the kitchen.

The kids are home this week for Thanksgiving break. I try to keep them busy so, today we made cookies. The kids each had friends over and I needed something to keep them all from getting bored. I made gingerbread cookie dough last night so it was ready for rolling and cutting. My kids love to cut the dough into fun shapes, and later cover the cookies in colored frosting or sprinkles.


Baking together has become a tradition in our home. Not only is it a sweet treat, but baking together is always makes fun filled happy memories and simple math lessons for children.
We all had a great time.

Thursday, November 19, 2009

Let Them Have Pie

My kids picked out pies for their teachers to share with their families over Thanksgiving break. We were originally going to buy one 9 inch pie for theier entire family to enjoy but, I could not decide what kind to get. Just then, my kids stubled across these (adorable) individual pies. What a great idea to send the teachers a variety to choose from. They turned out pretty cute!

Monday, October 12, 2009

We Got Boo'ed

A Halloween tradition is spreading rapidly throughout the culture. Called "Getting Booed," it involves a family making a Halloween gift basket and leaving it anonymously on a neighbor's door step with a sign "You Got Booed." The receiving family's job, then, is to make up another gift basket and play the trick on another family in the neighborhood who doesn't have a 'got booed' sign on their door.
Last night we had a mysterious knock on the door. When the kids opened the front door, they found a bag of sweet treats along with a paper ghost and poem instructing them to do the same to two other neighbors.
My kids love this part of our Halloween tradition.

But there's been a little debate about whether or not this booing business is plain fun or plain inconsiderate. Is it spreading the Halloween spirit or just a glorified chain letter?
The truth is that it's both.
I still dig it, but I don't want other parents with children on the receiving end of a "You've been boo'ed" ghost to feel pressured to participate. It's hard enough to get Halloween costumes together and prepare for school parties. This I know. But since we ‘got booed’, it’s on!

Here is a BOO basket I found, made by Jennifer at The Buck Stamps Here
that I want to make.


Saturday, October 10, 2009

I Made a Diaper Cake

I spent days surfing the net trying to find decent free information on how to make a diaper cake. There is so much stuff out there that is just plain gibberish that left me with no clue how to actually make a diaper cake. Diapers are really expensive so, I wanted to make sure that I didn't ruin ANY of them. A good looking diaper cake costs a lot of money and was wondering why I decided to make one by myself.
After much research (online) I was still stumped but, I was determined! I really wanted to make one for a good friend of mine for her baby shower. So I just let my creative juices flow and here is what I came up with:


So, Here is a simple way to make a Diaper Cake
Diaper Cake Ingredients:
Baby bottle or empty cardboard towel roll
8 feet of 1” wide ribbon
8 feet of 1/2" accent ribbon
2 thin wooden dowelsRubber bands
Safety pins
Glue gun
50-90 newborn diapers (depends on the size and the number of tiers you desire)
Decorative baby items (bibs, socks, toys)
Cake Topper

Assembly:
When rolling your diapers, have them opened lengthwise with tabs tucked in Secure your diapers with a rubber band so they stick together
Bottom layer: use larger size diapers. Wrap one layer of rolled diapers securely around the baby bottle or towel roll. Continue to wrap diapers around in rows, until your desired bottom layer is the size you want it.
Middle Layer: will start off the same wrapping around the top of the baby bottle or towel roll. continue until you reach the size you want (about two rows smaller than the bottom layer.
Top Layer: Your top layer will be rows of rolled diapers smaller than your middle layer. I used two thin wooden dowels that went through all layers and served to just hold the top layer in place.
Use a safety pin to hold ribbon around your diaper layers. Your 1" ribbon should cover and hide the rubber bands around your layers. Do this to all layers. Use an accent ribbon 1/2", hot glued over the first one, as a decorative touch. This also helps hide the rubber bands even more.
Assemble your tiers on top of eachother
Tuck your baby items in the ribbons, or flowers as decorations
Top your cake off with something fitting the theme of your party. Whether it be a small stuffed toy, a baby bottle or slippers
This project took me less than an hour and I had a lot of fun making it.
Most people see diaper cake making as a difficult task, but it doesn’t have to be that way. I found it very fast, easy, and fun. And the best part...no wasted diapers!!